My First Quilt
Posted by Gerry Kershaw on 16th Dec 2024
**A Journey of Learning and Perseverance**
As a beginner quilter, I was excited to take on my first project - a baby quilt for a special friend whose little one is due soon. My motto is simple: "If you can sew a straight line, you can make a quilt," and with some practice, you can even create a beautiful **Jacqueline de Jonge**-style quilt! In this blog post, I'll share my journey of creating my first quilt, including the fabric selection, assembly, quilting, and binding.
**Fabric Selection: A Deliberate Choice**
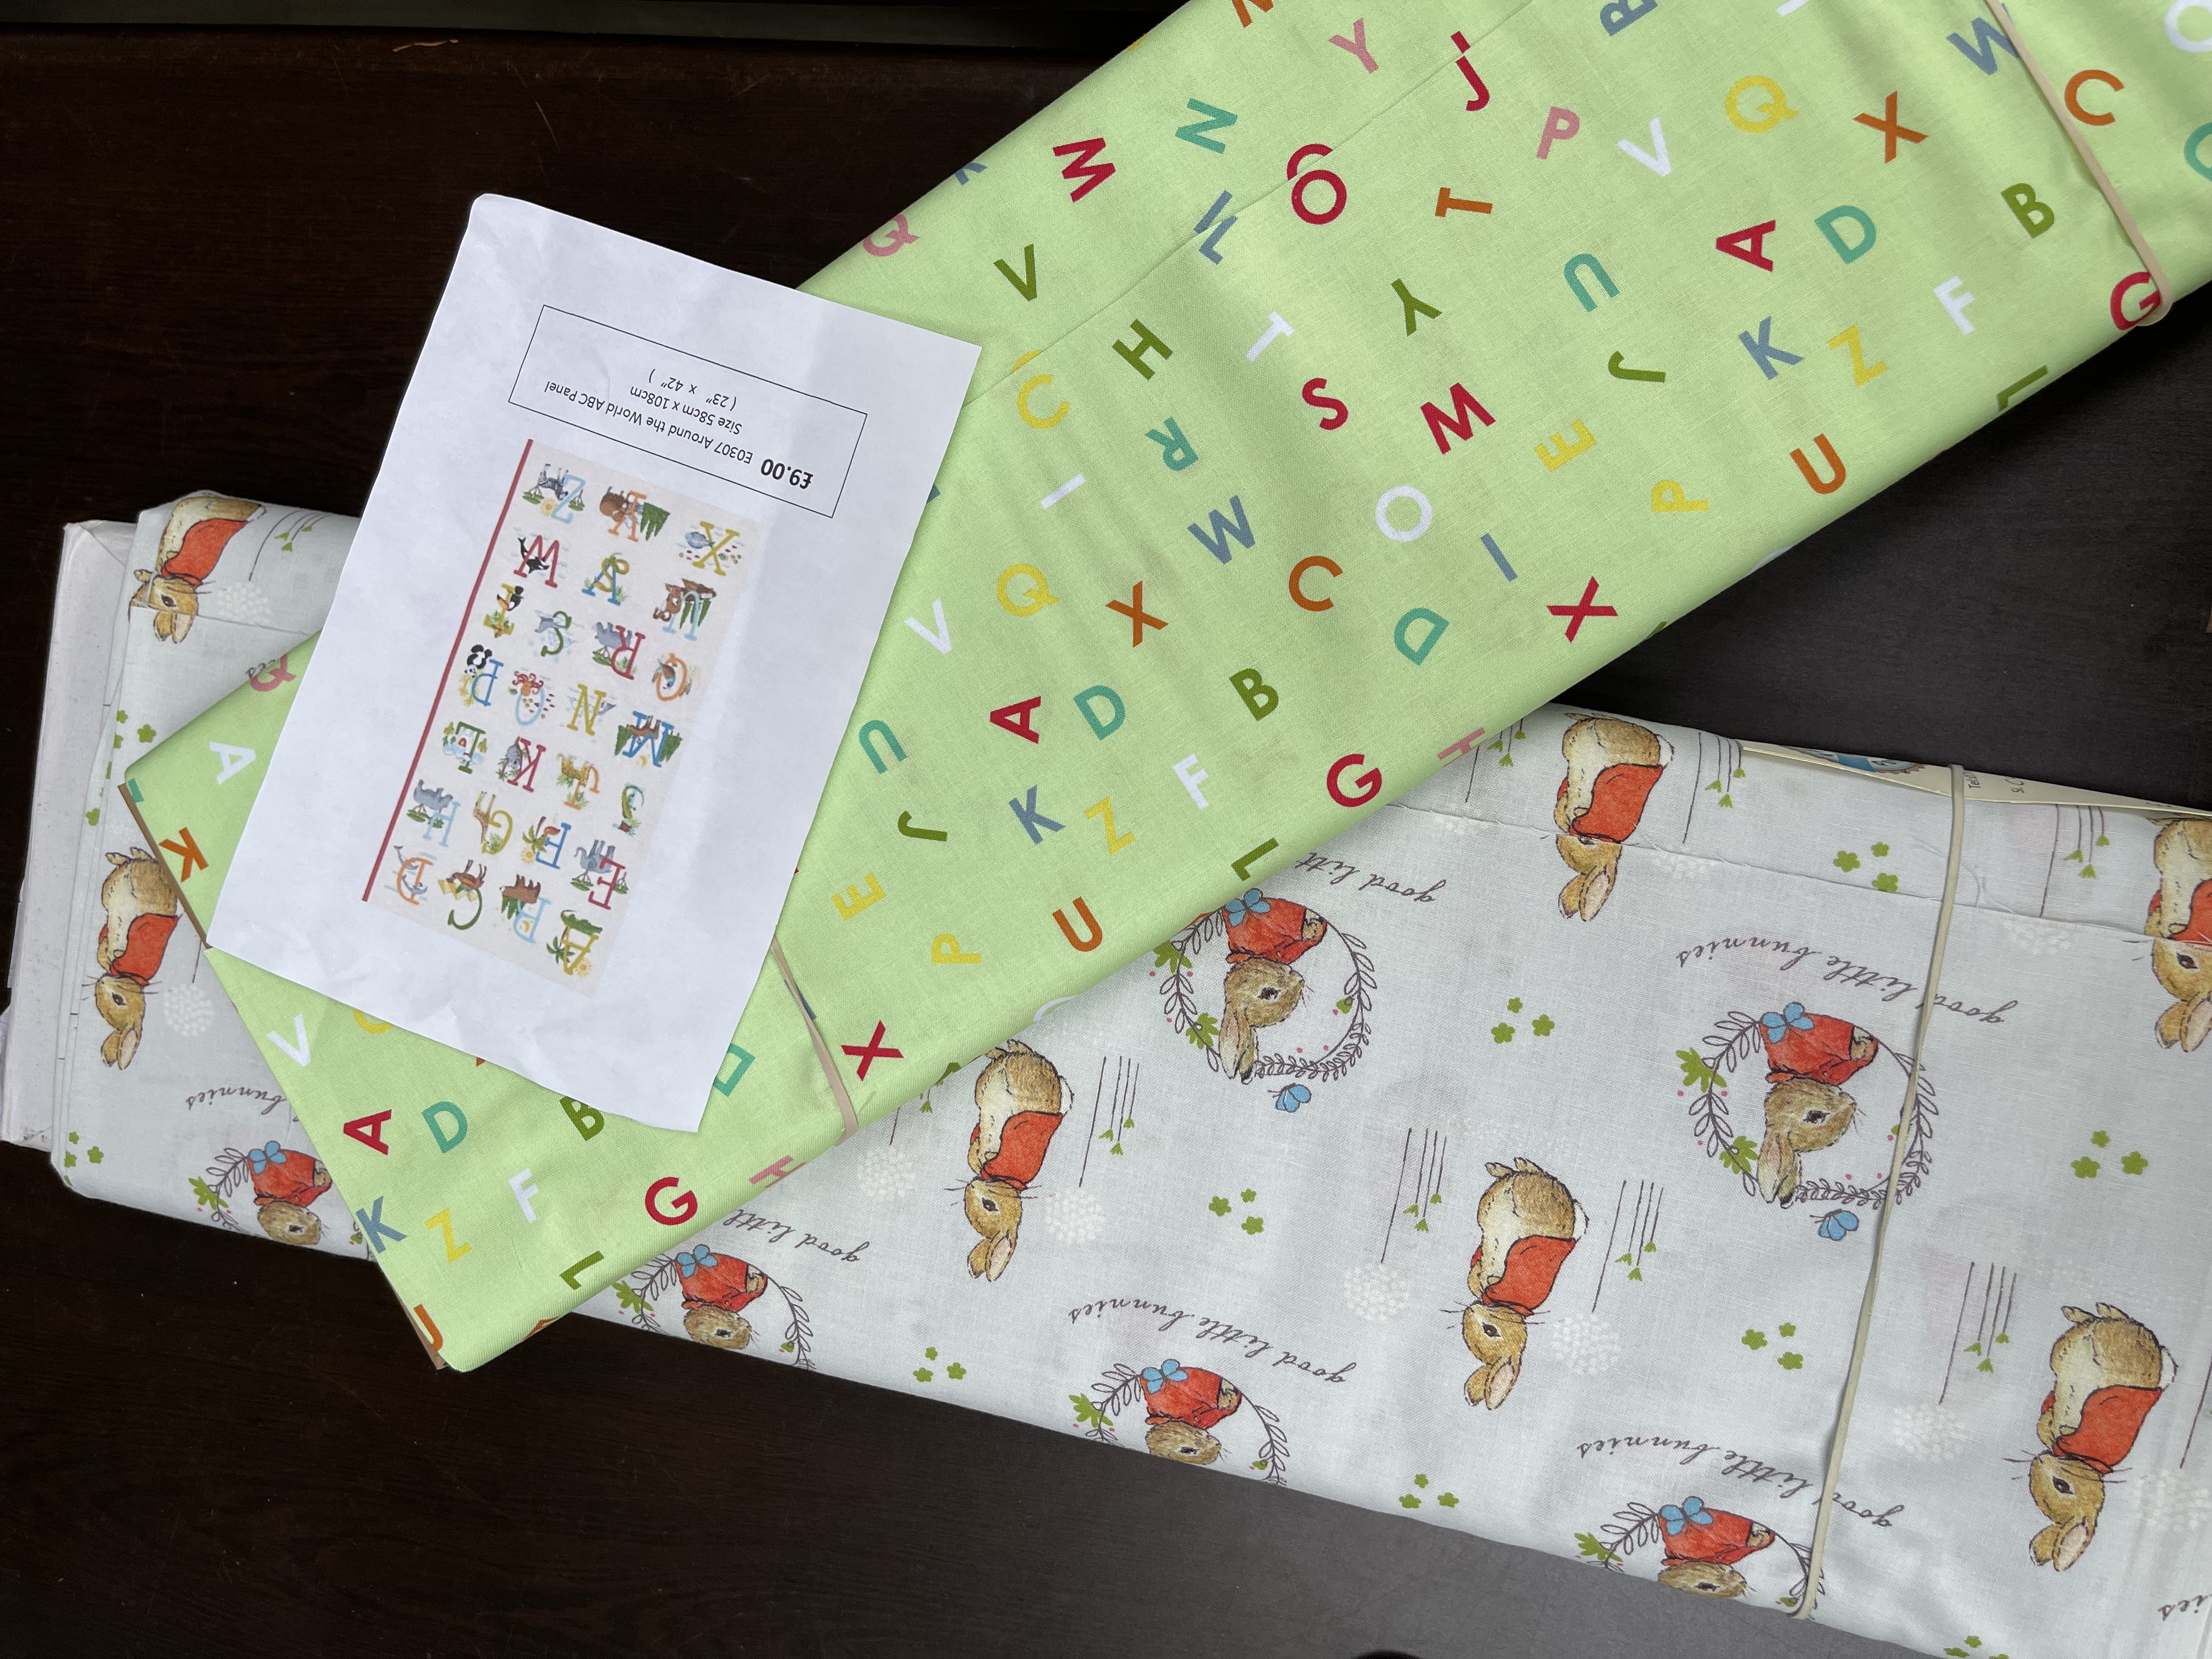
Choosing the right fabrics for my quilt was a crucial step. For the panel, I opted for a simple design an ABC panel with 5-inch squares around an alphabet theme. The panel measured 23 inches by 42 inches, but I wanted to increase its width to create a more balanced look. To achieve this, I added two 4-inch strips, which resulted in a wider quilt measuring 40.5 inches.
For the fabric selection, I deliberated between Peter Rabbit and a light green with coloured letters. After auditioning my options against the panel and light green fabric, I decided on the latter for its better contrast and separation from the panel. This choice also made it easier to create four-inch strips for the sides of the quilt, and decided to use Presencia cotton thread as it is strong and colour fast.
**Auditing Fabric Choices**
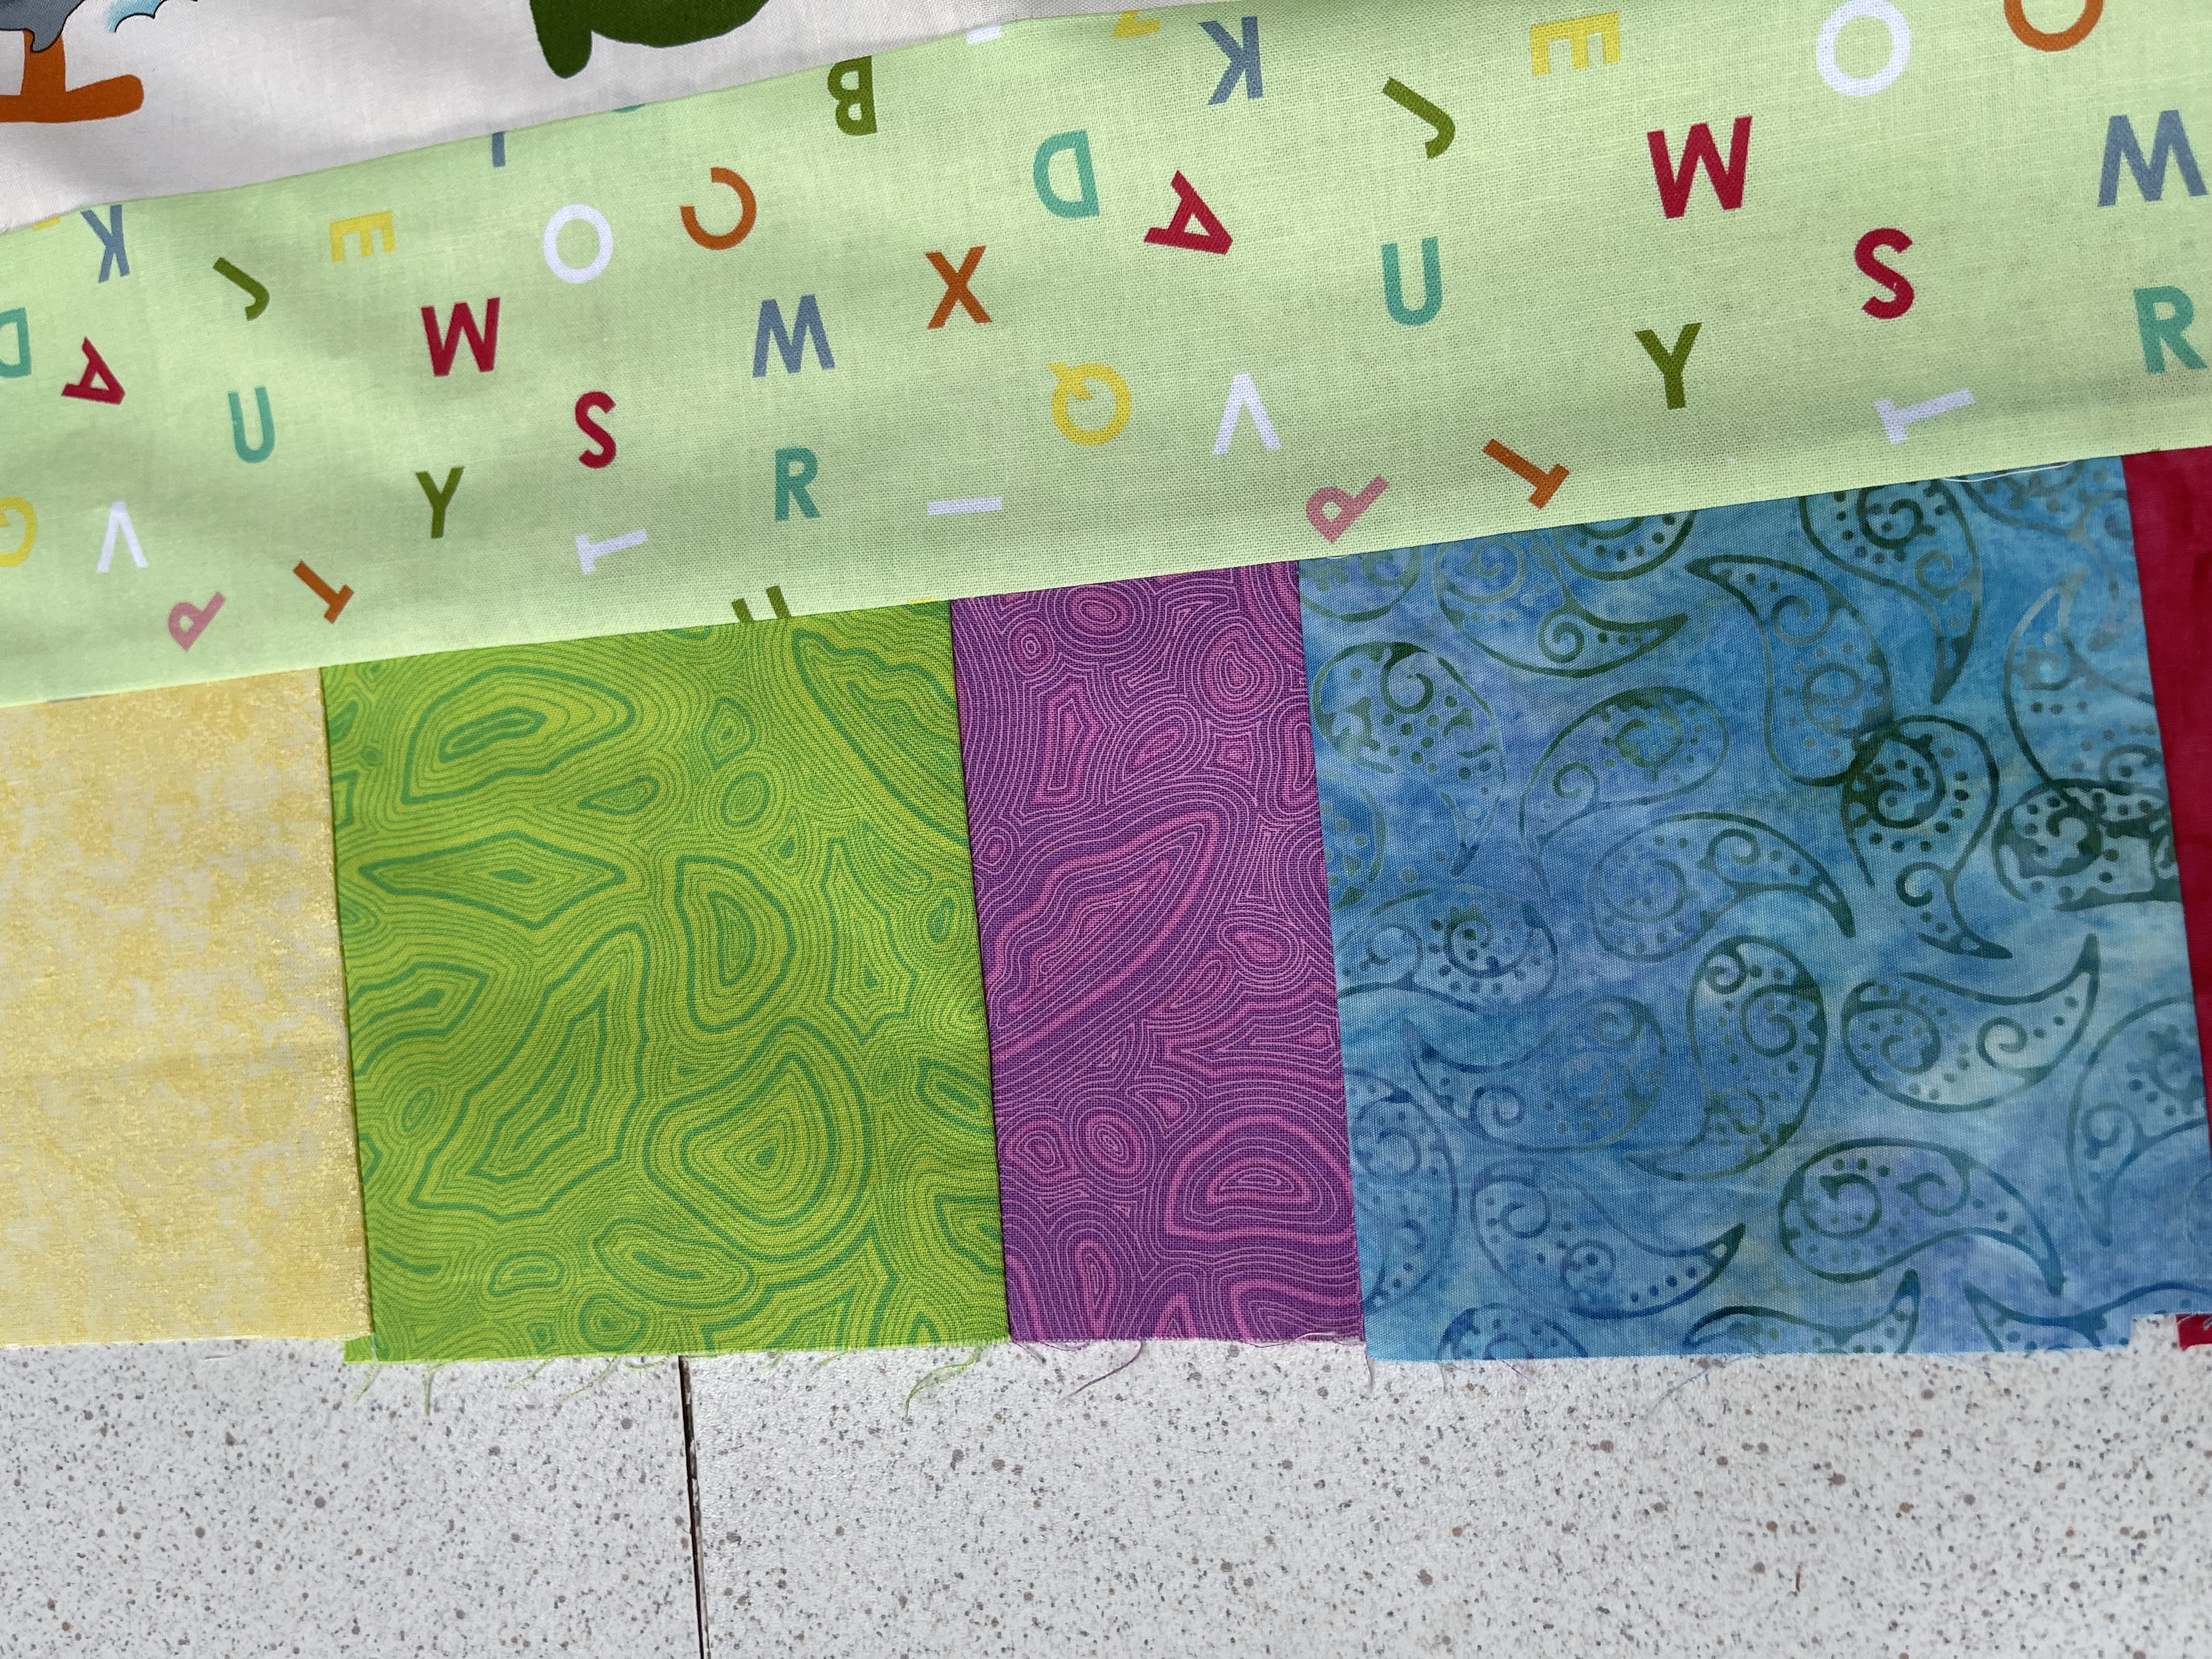
As a quilter, it's essential to consider the properties of each fabric. For my quilt, I chose fabrics with minimal stretch, such as the **Jacqueline de Jonge** batik, Fairy Frost and Tula Pink Mineral, which are 100% cotton and easy to work with. The blue batik and fairy frost has virtually no stretch, making it ideal for this project.
I also considered the colour palette of each fabric, ensuring they would complement each other and create a harmonious look. I wanted to avoid clashing colours or patterns that might detract from the overall design.

**Tips for Fabric Selection**
- Choose fabrics with minimal stretch for a more stable quilt.
- Consider the colour palette and ensure it complements the panel or central design.
- Opt for 100% cotton fabrics, as they are easy to work with and provide a crisp finish.
- Don't be afraid to experiment with different fabric combinations until you find one that works.
**Assembling the Quilt Top**
The first task was to straighten the panel and remove the selvage edge. I pressed the fabric to eliminate any creases and then flattened the 5-inch squares. To my surprise, some of the squares were slightly larger than others! After re-measuring, I realized that a few had been cut incorrectly, so I adjusted their size accordingly.
Assembling the quilt top was a crucial step in creating this project. To ensure even seams, I used a consistent seam allowance and pressed each square before attaching it to the next. This helped prevent puckering or bunching of fabric.
**Tips for Assembling the Quilt Top**
- Hold your fabrics steady with both hands to avoid wonky seams.
- Double-check that your sewing machine foot has a ¼ mark on it.
- Use a seam guid ruler
- Use quality fabric to minimize stretching issues.
- Remove selvage edges before assembling the quilt top.
- Backstitch at the beginning and end of each line sewn to prevent thread coming undone.
**Quilting: A New Skill Learned**
For this project, I chose to use a simple quilting pattern. This was an excellent opportunity for me to practice my quilting skills, which were still in their infancy. After applying a layer of batting and backing fabric and pining the quilt together with curved safety pins, you carefully stitched the quilt top together using a walking foot on your sewing machine. I took the easy way out and gave my quilt to Sue who assembled the quilt on her long arm quilting machine very easy to do and Sue is very cleaver see the Video
As a beginner quilter, you can encounter several challenges during this process. One common issue was tension in the thread, causing it to bunch or pucker in certain areas. To overcome this, I adjusted the stitch length and tension on your machine until I achieved smooth results.
**Tips for Quilting**
- Give your quilt to Sue@Passion4quilting.com very reasonable prices
- Use a consistent stitch length to maintain even tension.
- Keep your threads organized to avoid tangles.
- Make sure your batting is evenly distributed to prevent lumps or bulges in the quilting.
- Practice, practice, practice - it takes time and patience to develop good quilting skills!
**Binding: The Finishing Touch**
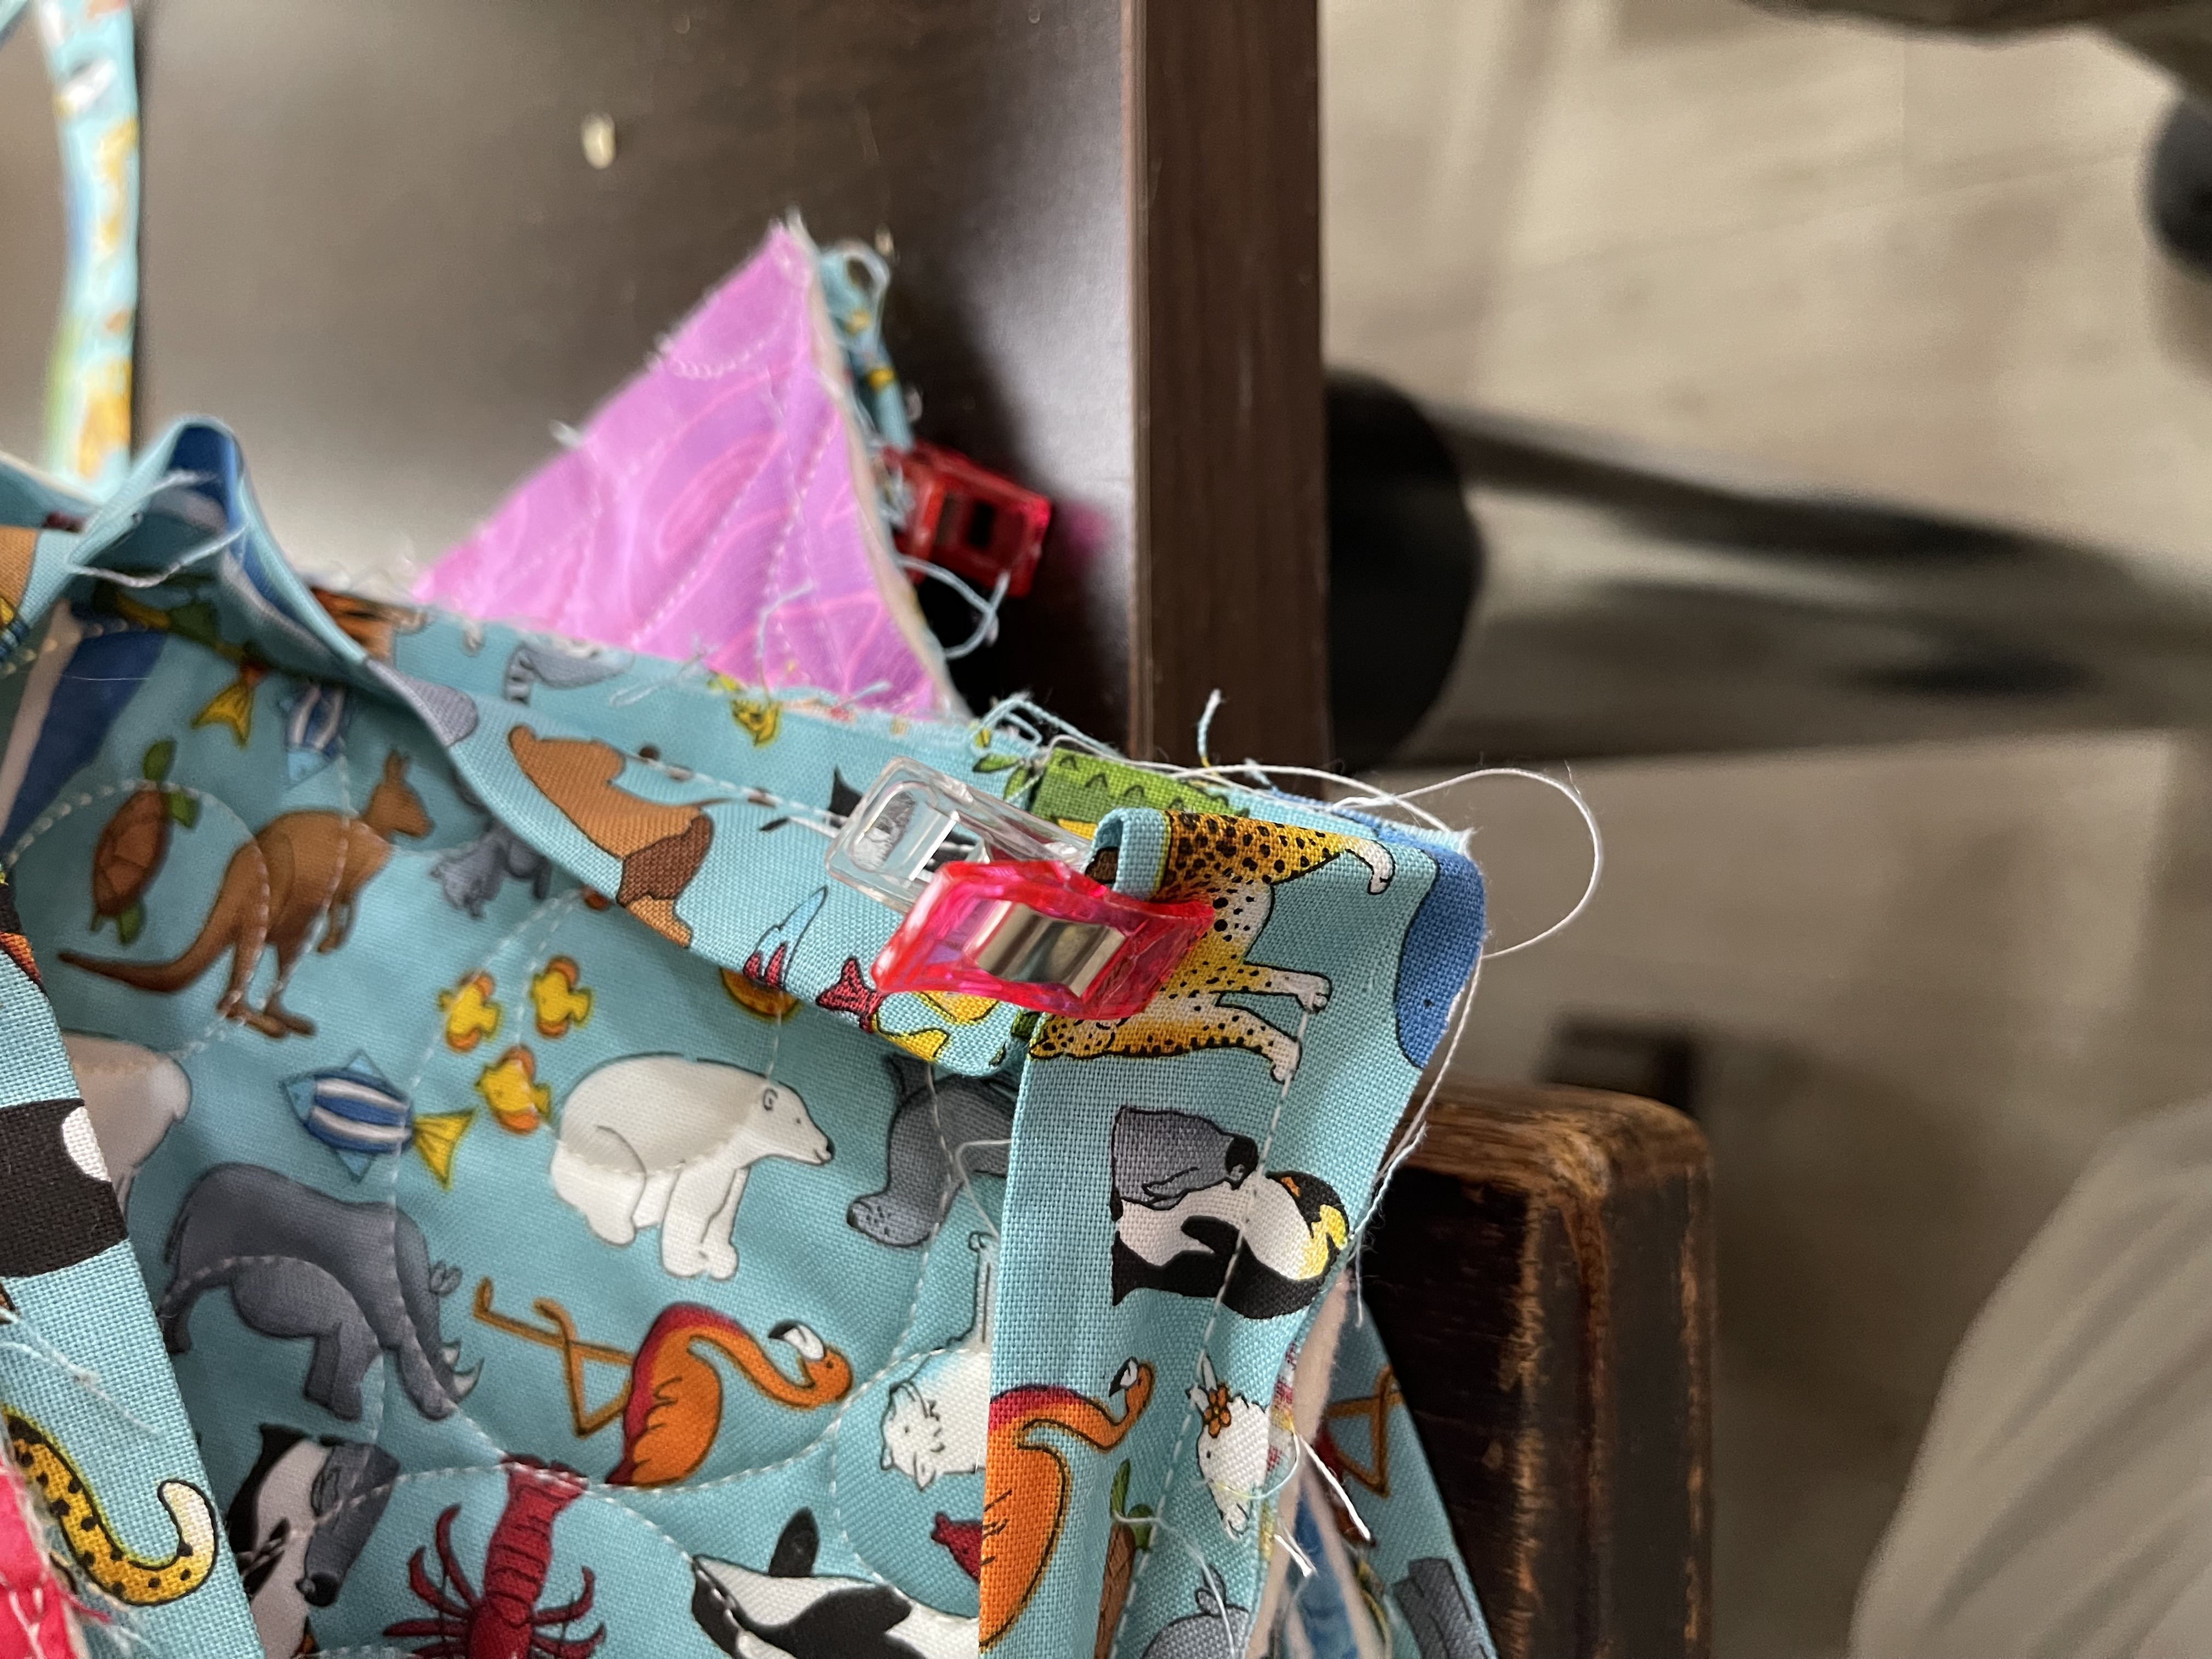
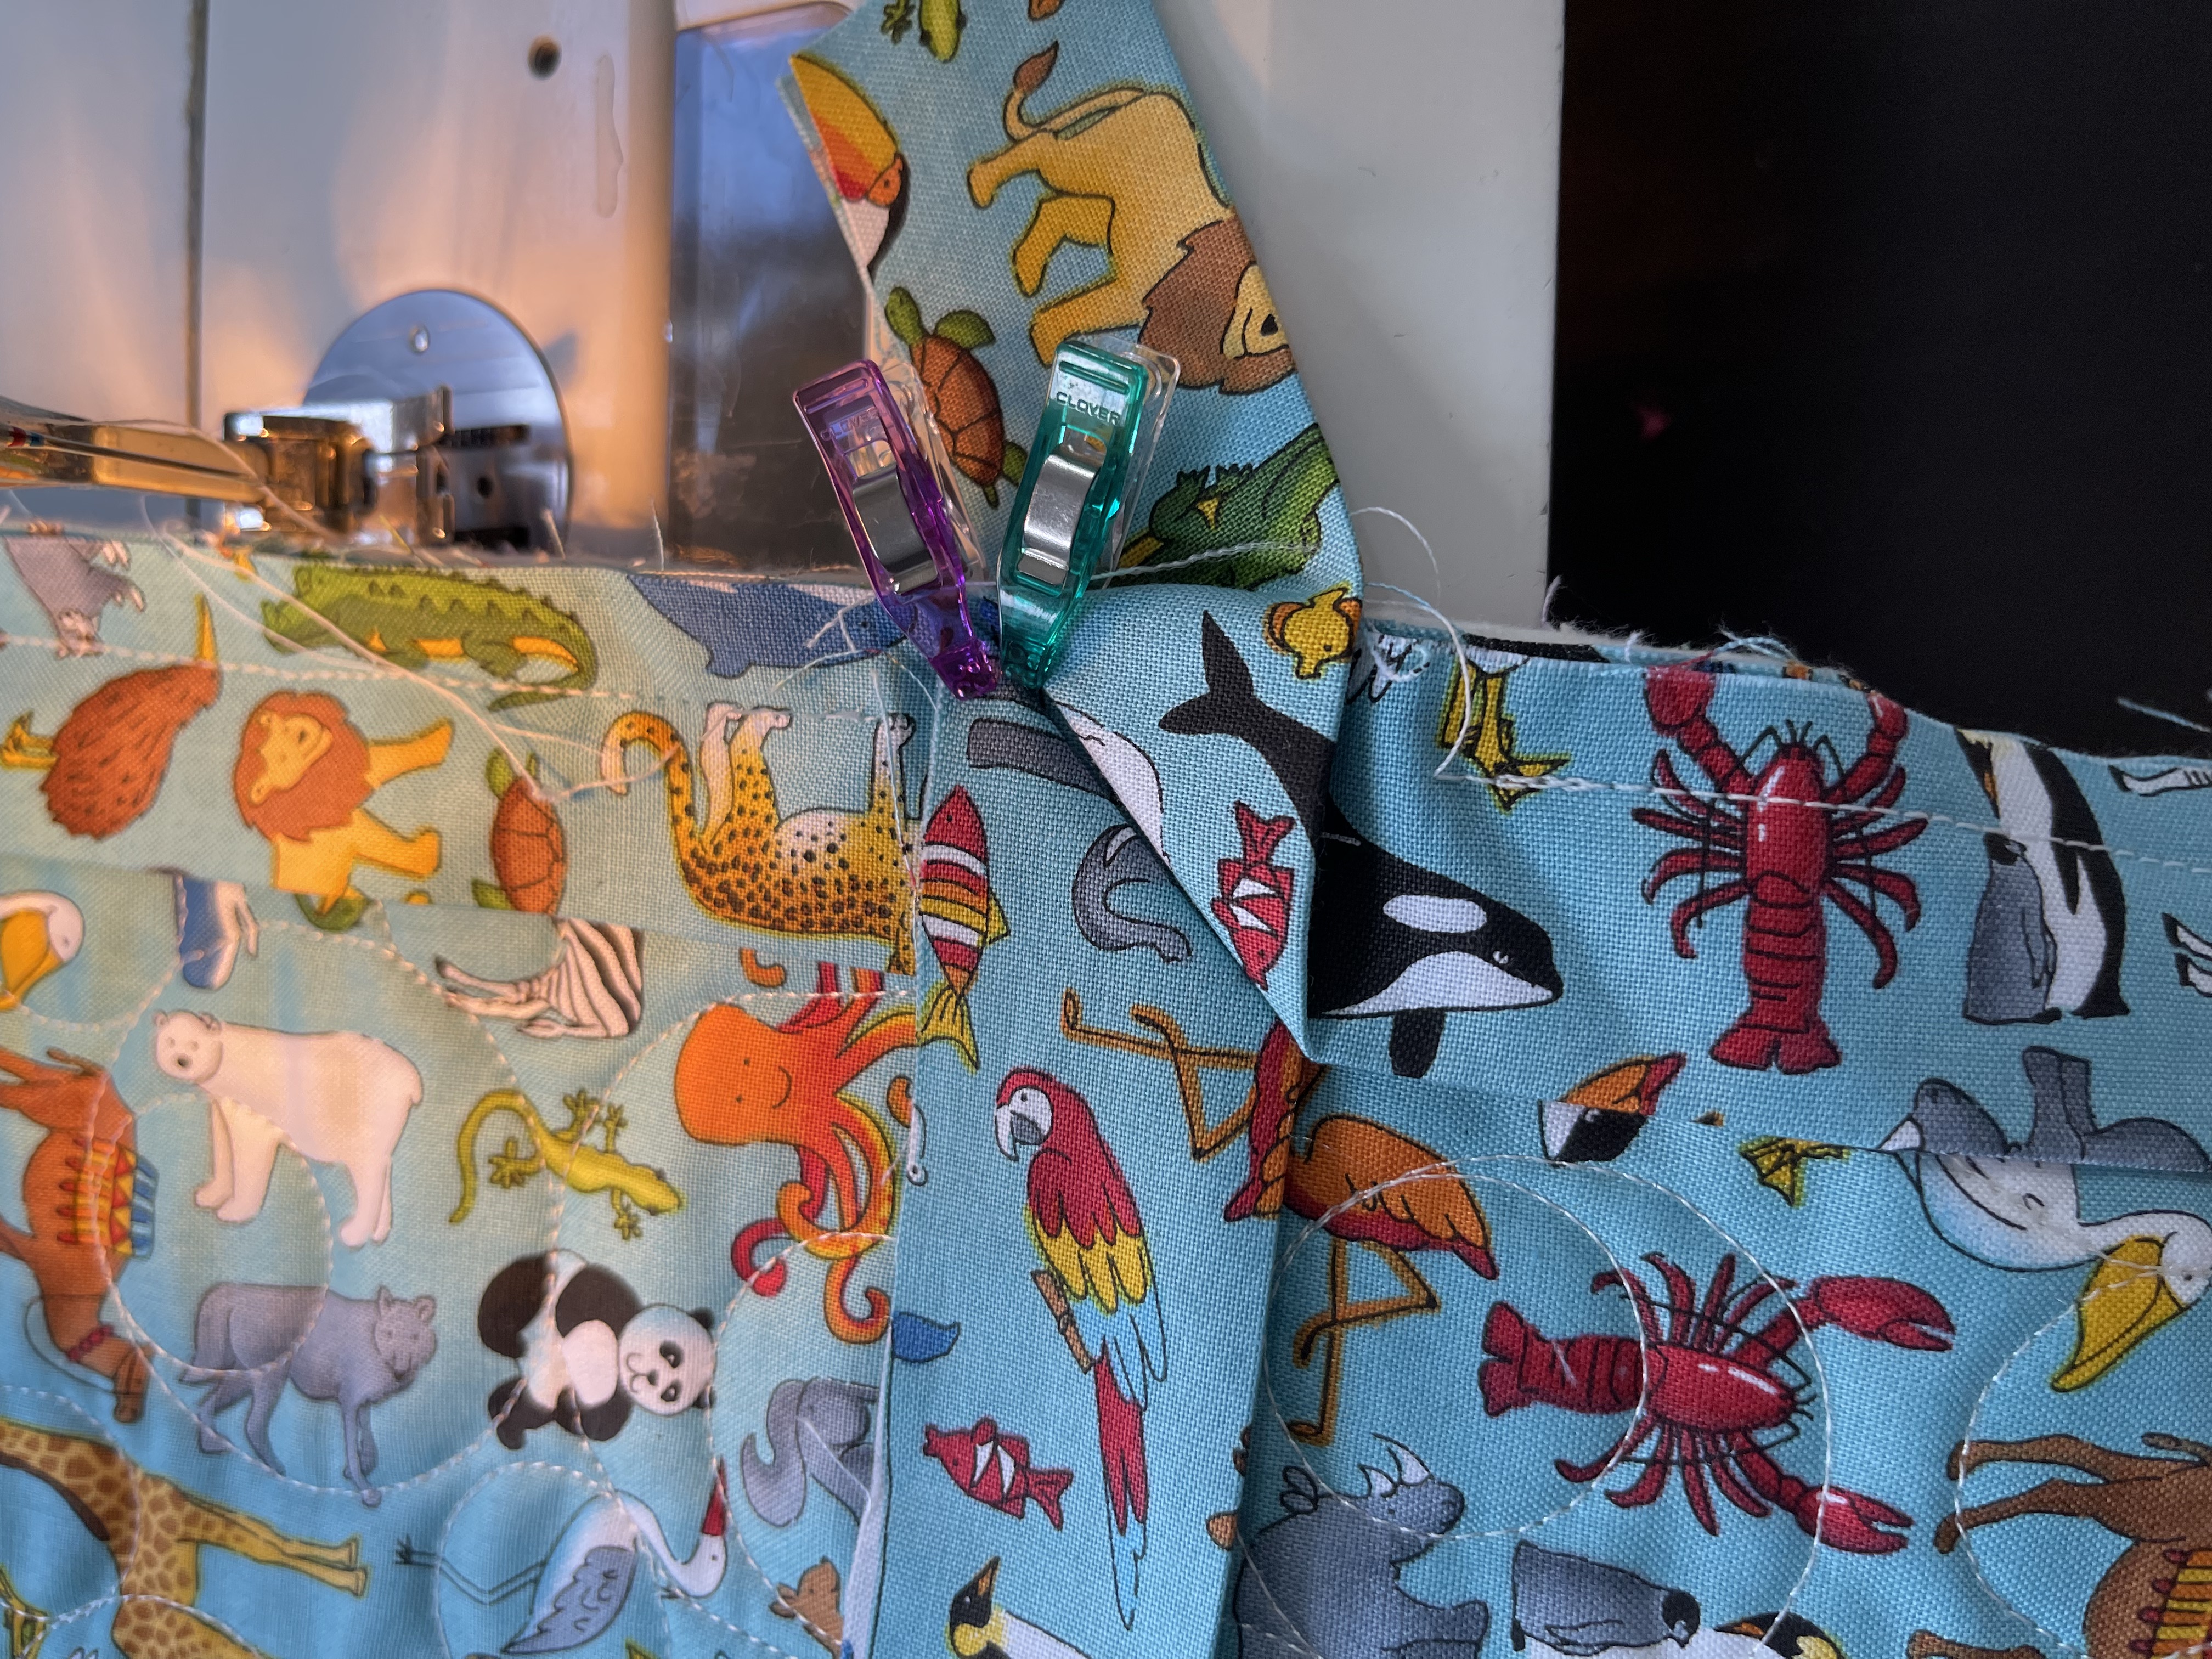
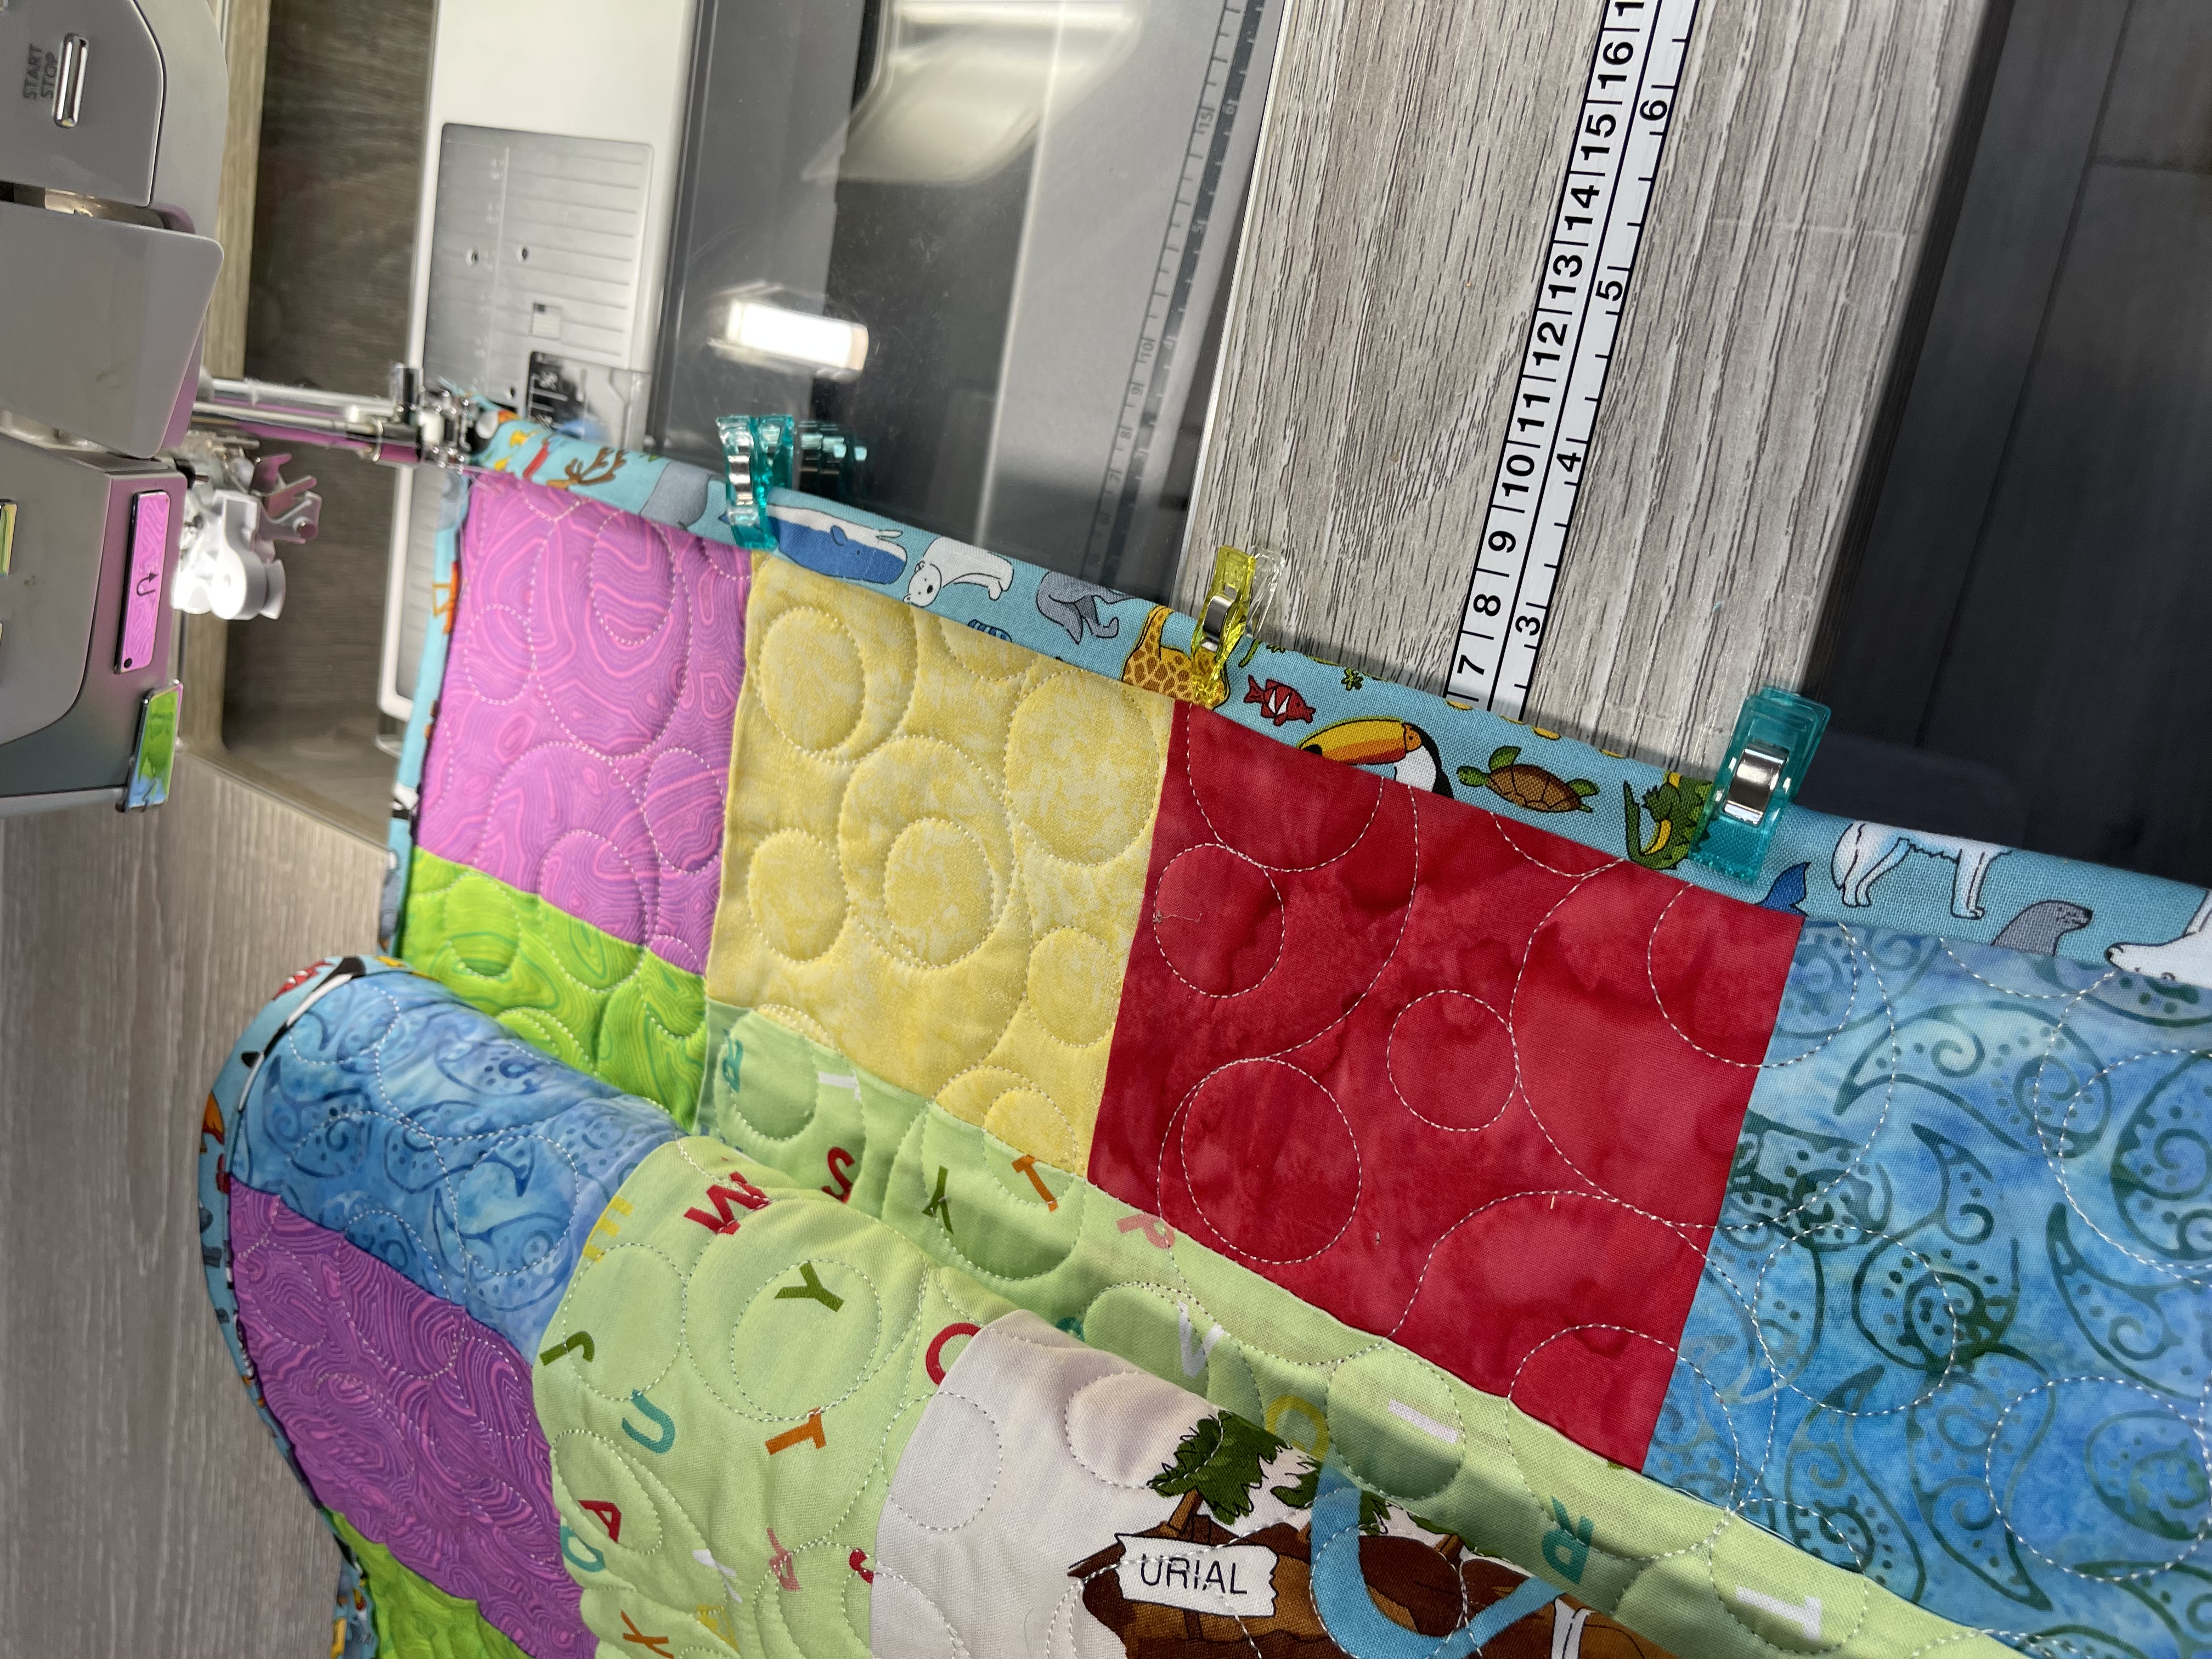
The binding was a delightful part of this project. I created two and half-inch strips from the spare backing fabric and joined them end-to-end, folding over the fabric to create a crease in the middle. Next, I pinned or clipped the binding to the back of the quilt mid-way along an edge.
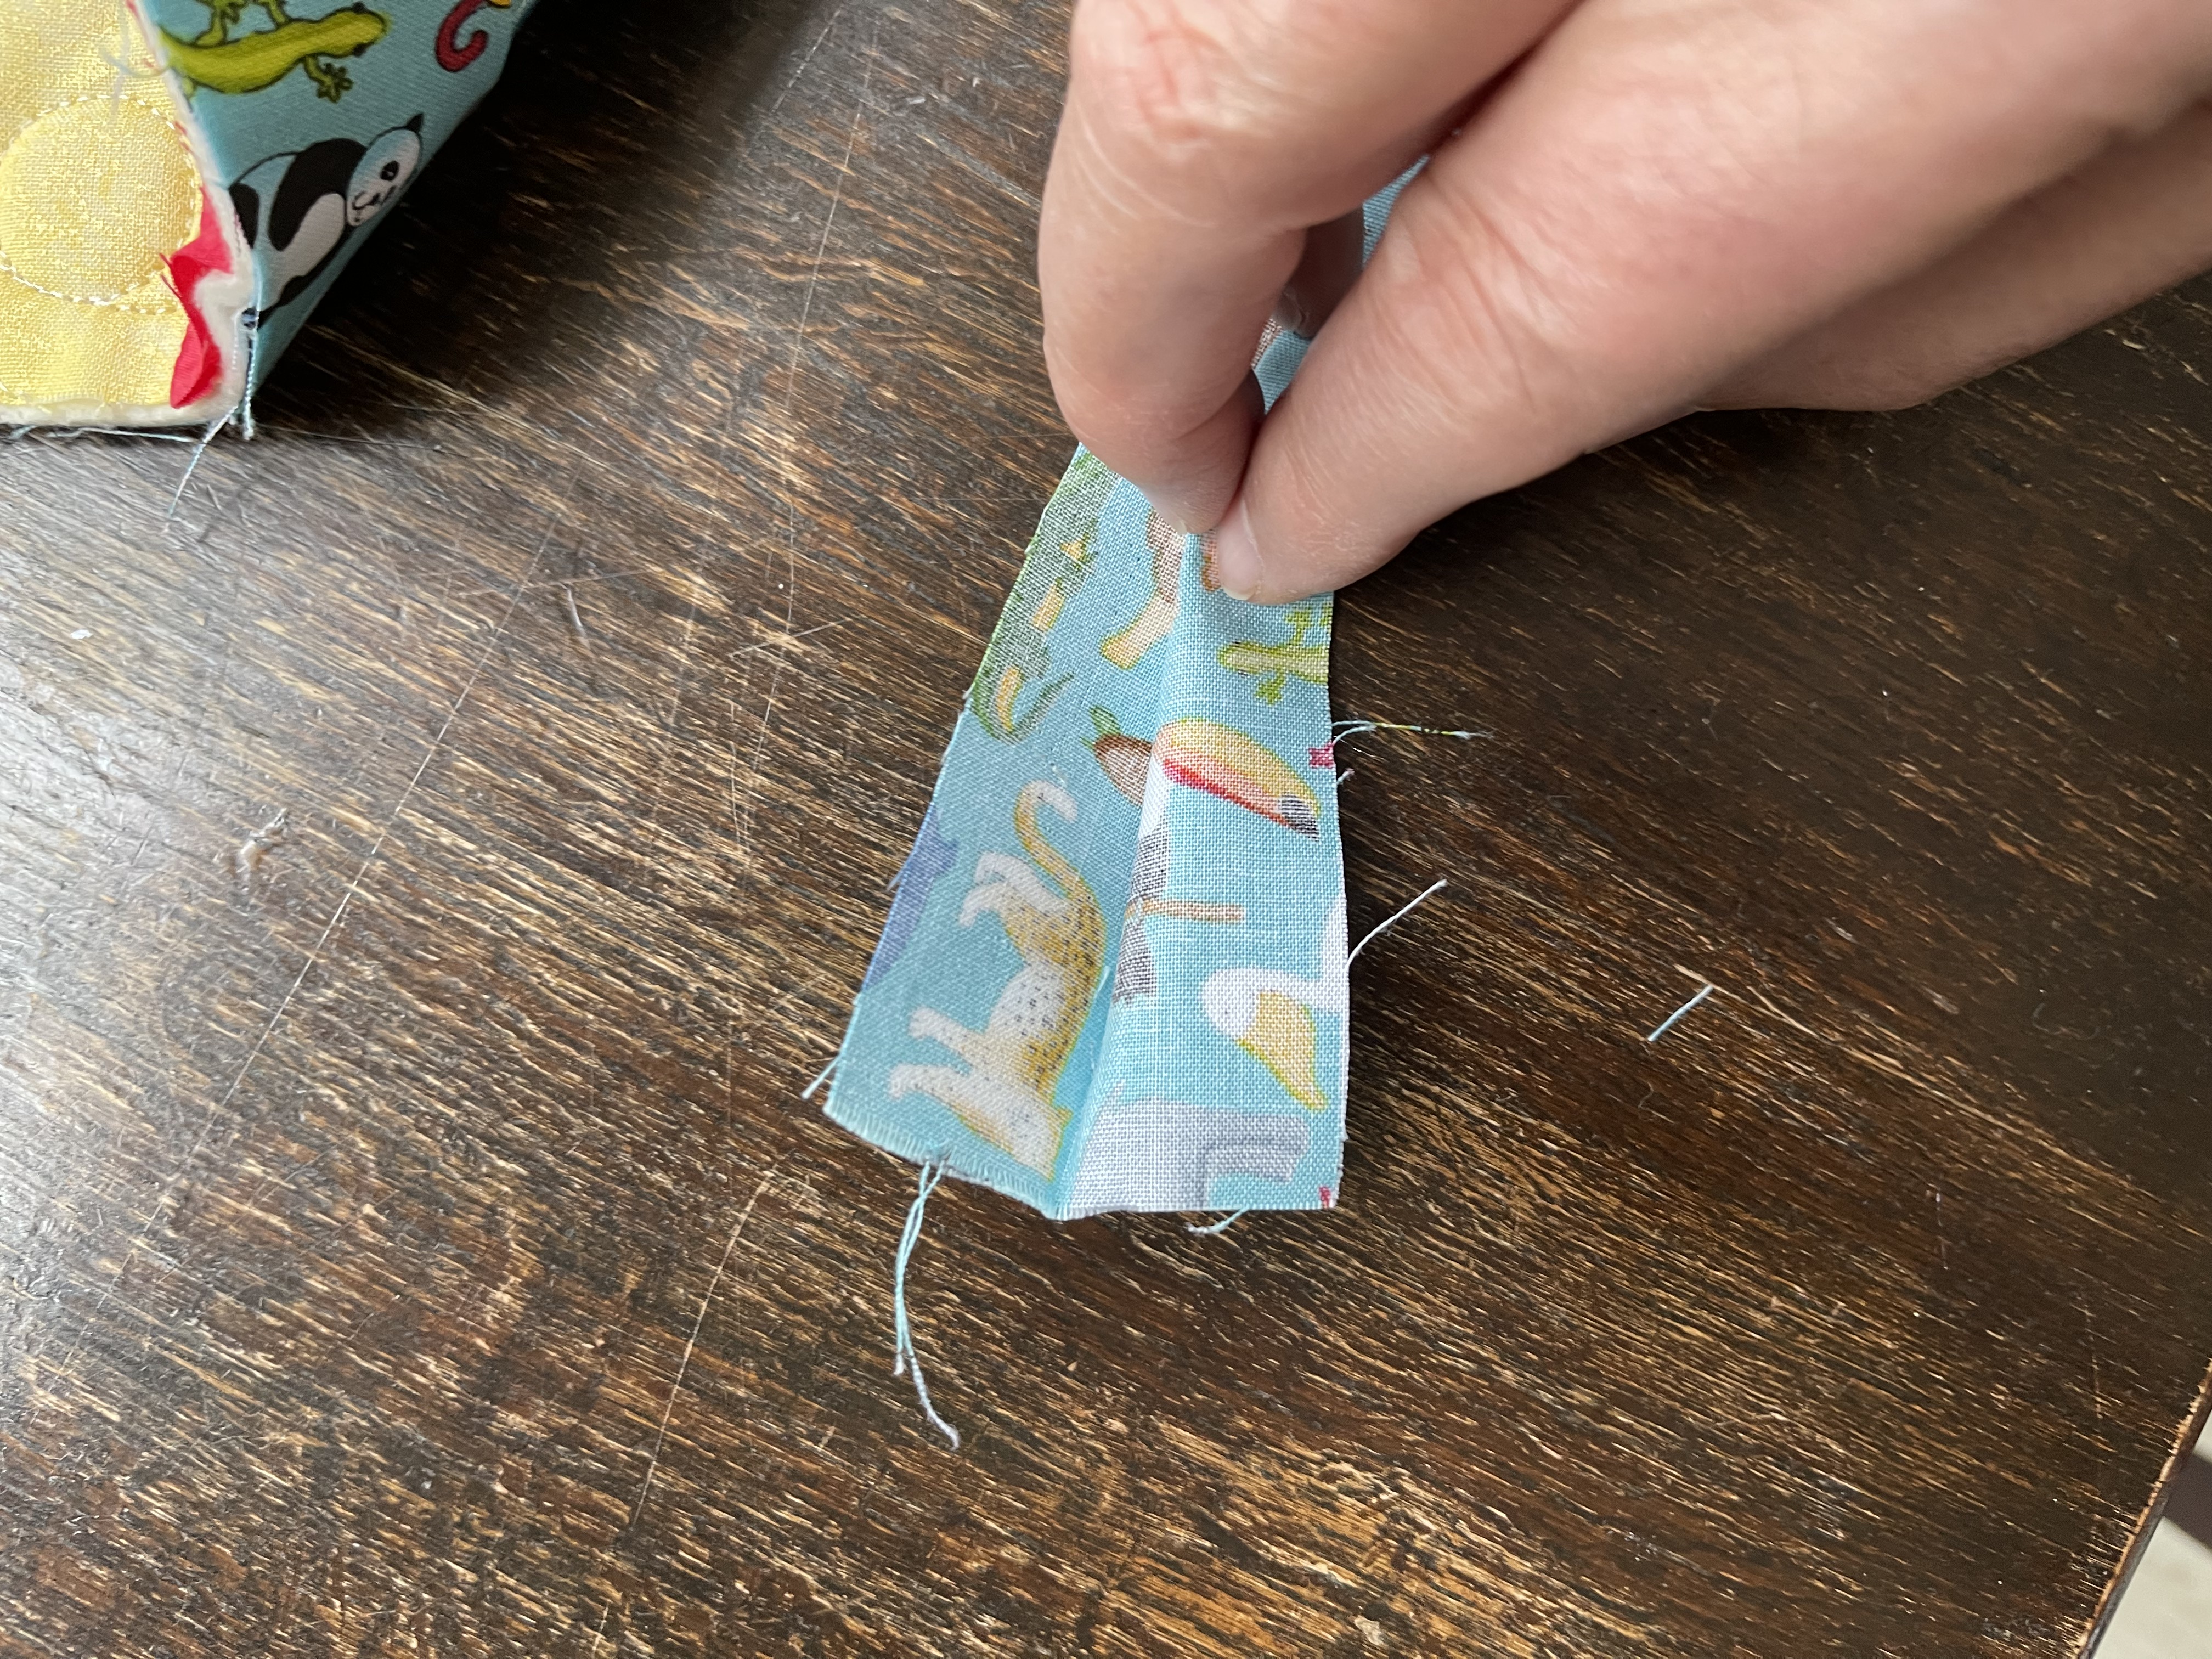
As I sewed on the binding, I encountered another challenge: uneven edges. To address this, I trimmed the excess batting and backing fabric, ensuring they were flush with the edge of the quilt top. This helped prevent puckering or bunching in certain areas.

**Tips for Binding**
- Use a consistent seam allowance to ensure even edges.
- Press your binding as you go to prevent wrinkles and creases.
- Don't be afraid to trim excess batting and backing fabric if necessary.
- Consider using a walking foot on your sewing machine to help guide the binding.
**Overcoming Challenges**
As any quilter can attest, there are countless challenges that arise during the process. One common issue is uneven seams or puckering in certain areas. To address this, I adjusted my seam allowance and pressing technique until I achieved smooth results.
Another challenge was tension in the thread, causing it to bunch or pucker in certain areas. To overcome this, I adjusted the stitch length and tension on my machine until I achieved smooth results.
**Tips for Overcoming Challenges**
- Don't be discouraged by setbacks or challenges - they're an opportunity to learn and improve.
- Keep a stash of spare fabric and materials handy in case of emergencies.
- Practice patience and persistence when faced with difficult tasks or projects.
- Consider seeking guidance from more experienced quilters or online tutorials.
**The Finished Quilt**
After several weeks of work, the quilt was finally complete. I added a few decorative stitches to enhance its appearance and tied it off with a matching thread colour. The result was a beautiful, handmade quilt that exceeded my expectations in both design and quality.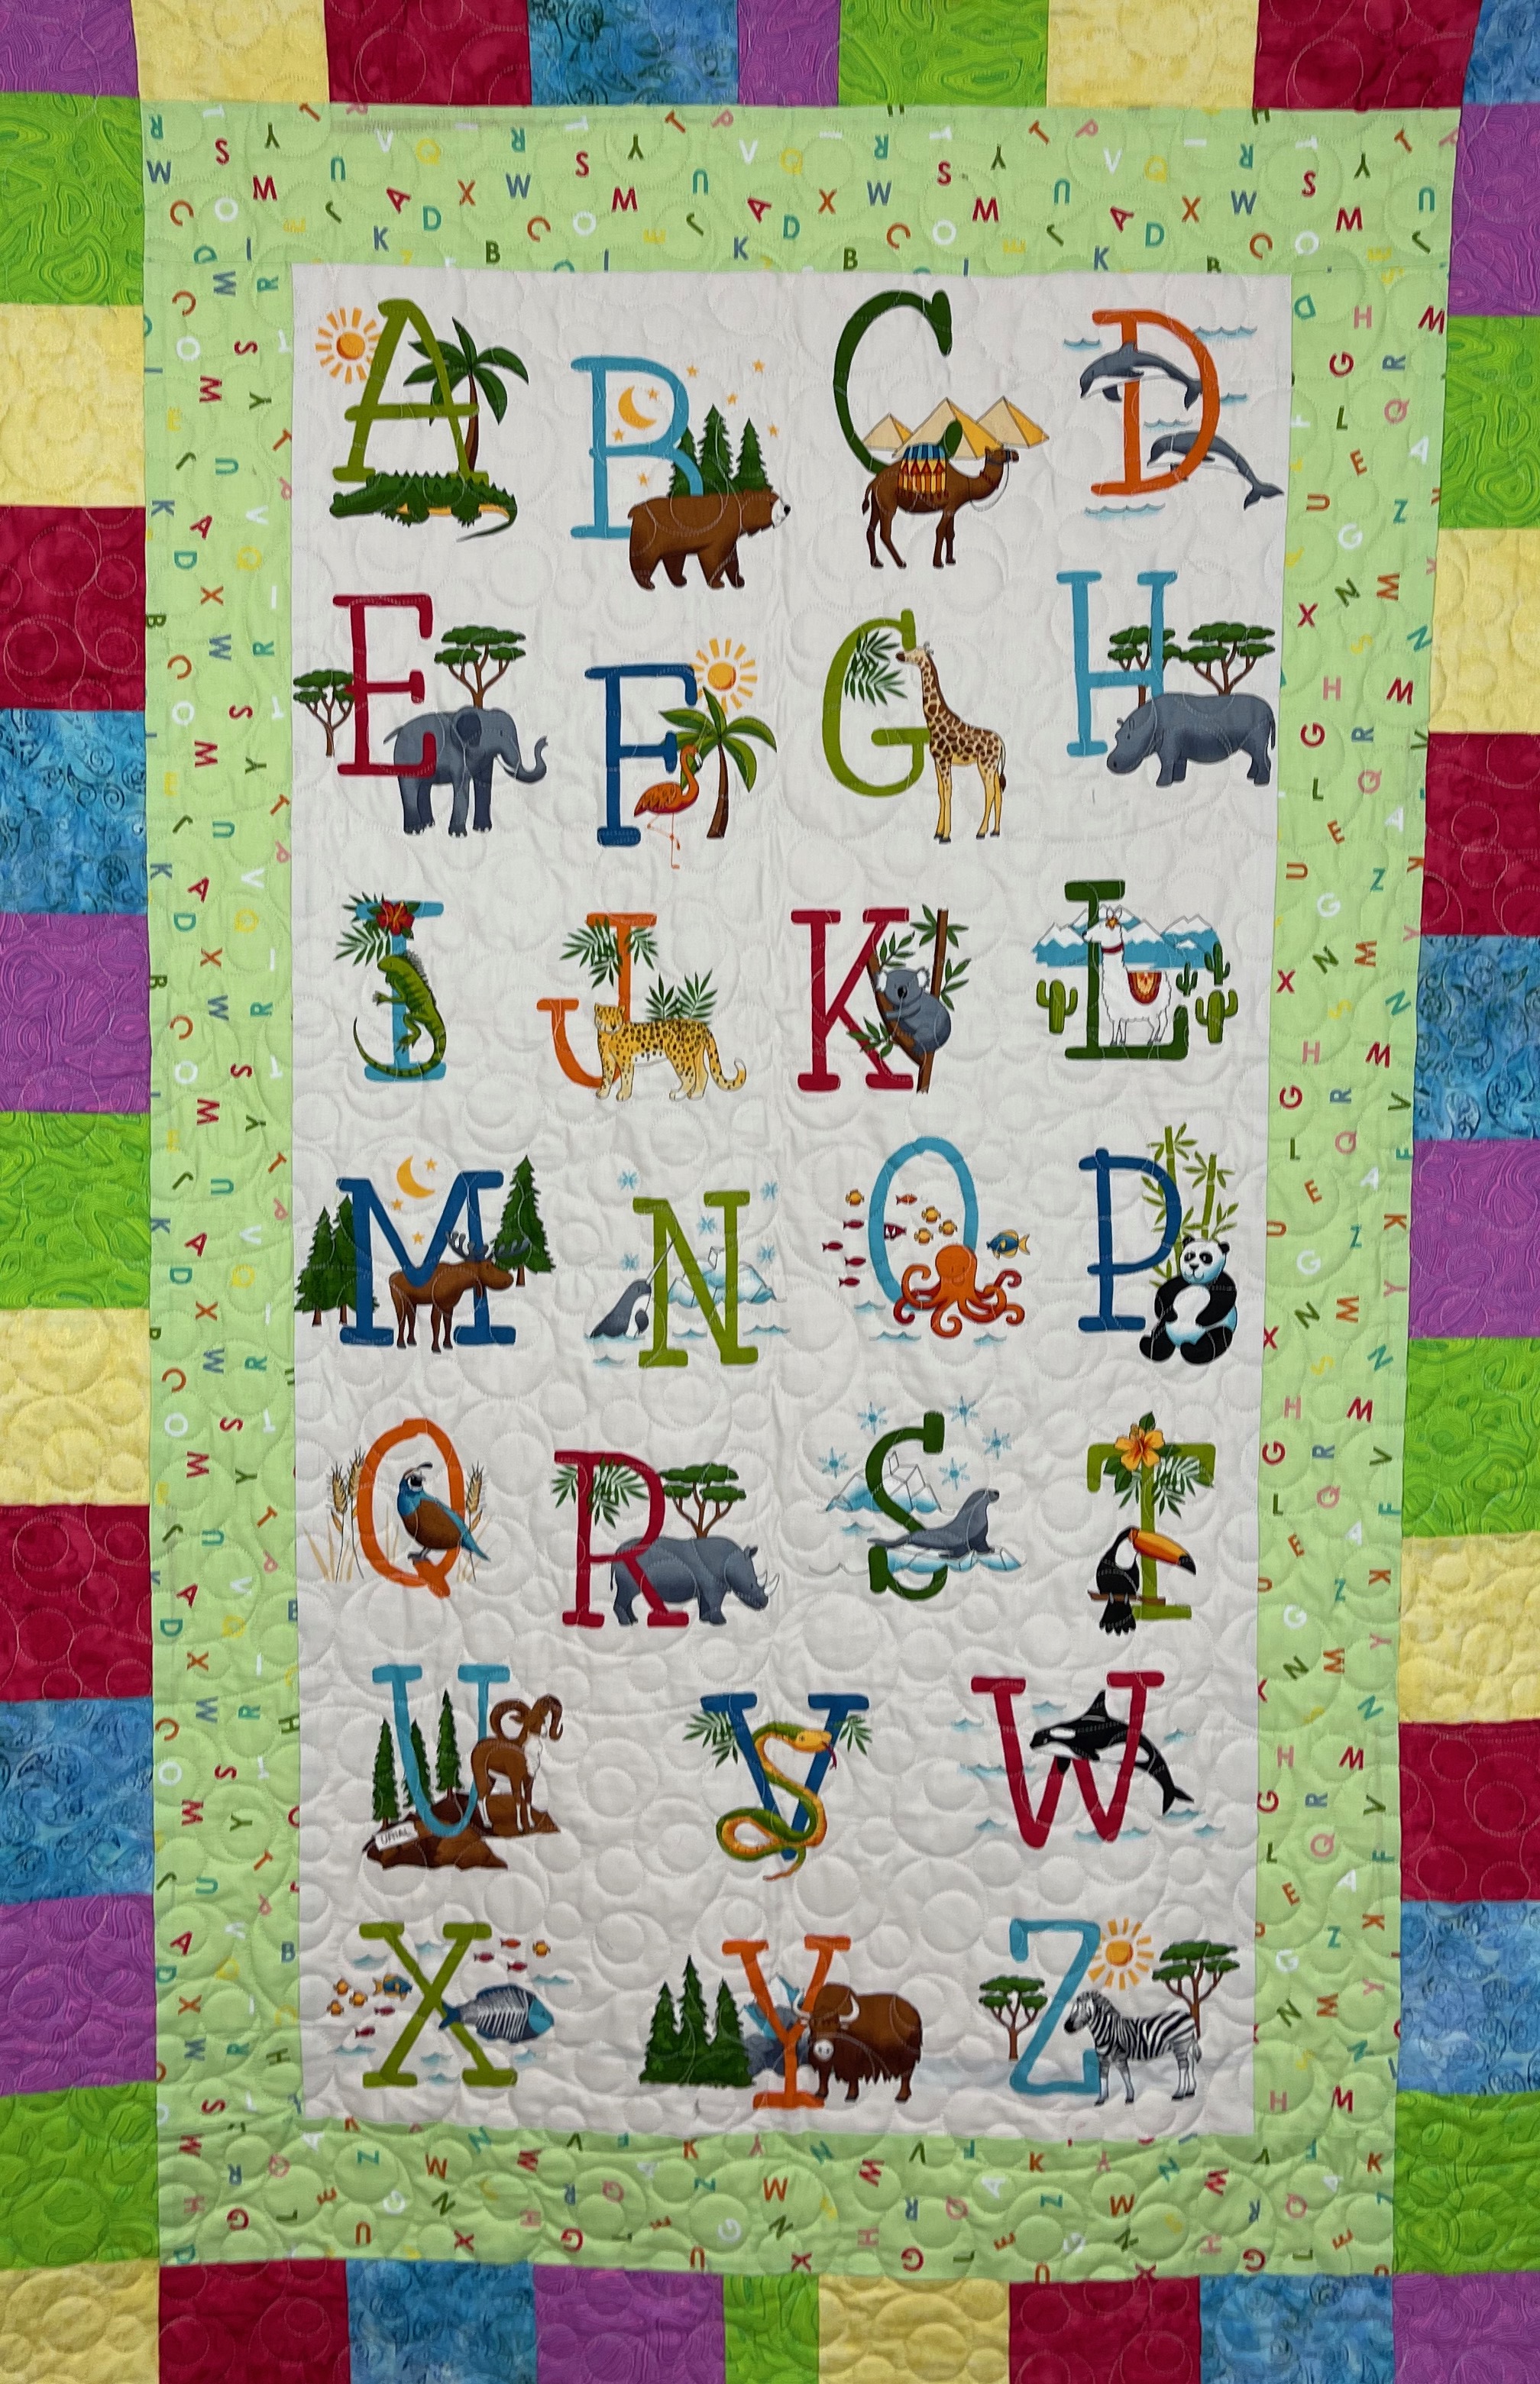
**Conclusion**
Creating my first quilt was an exhilarating experience that pushed me out of my comfort zone and taught me valuable skills in sewing and quilting. While it wasn't without its challenges, the finished product far exceeded my expectations and became a treasured keepsake for my friend's baby.
If you're a fellow beginner quilter or just starting to explore this craft, I hope my story encourages you to take on your own projects with confidence. Remember that every quilt is unique and presents new opportunities for growth and learning.
**Tips for Fellow Beginners**
- Start small - choose simple patterns or designs to begin with.
- Practice patience and persistence when faced with difficult tasks or projects.
- Don't be afraid to ask for guidance from more experienced quilters or online tutorials.
- Keep a stash of spare fabric and materials handy in case of emergencies.
**Final Thoughts**
Creating my first quilt was an incredible journey that taught me valuable skills, presented new challenges, and produced a beautiful, finished product. Whether you're a seasoned quilter or just starting out, I encourage you to take on your own projects with confidence and enthusiasm.
As I wrap up this blog post, I'm reminded of the countless hours and effort that went into creating this quilt. But most importantly, it's the love, care, and dedication that shines through in every stitch, making it a truly special keepsake for years to come.
Happy sewing!


